
On this page
Uploading Product Information
HSN ECO Vendors Only: BATCH UPLOAD
Please refer to the “HSN ECO Vendor Guide” guide located in the Assistance Center’s “Partnerships and Manuals” section of VendorBridge, under the "HSN" tab.
All Other Vendors (Including Standard HSN): BATCH UPLOAD
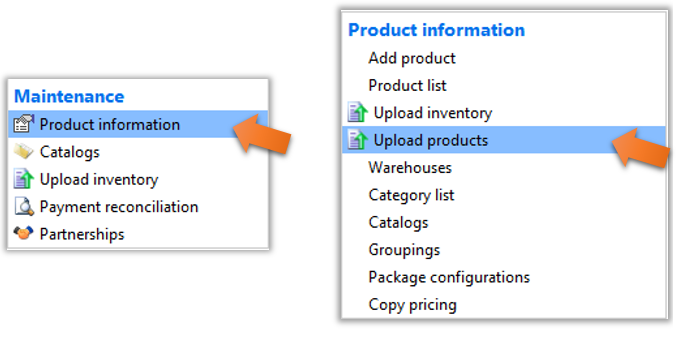
- Fill out the appropriate spreadsheet from the “Upload Products” page. You can reach the “Upload Products” page by clicking on the “Product Information” link under the “Maintenance” header then clicking the “Upload Products” link, as shown below.
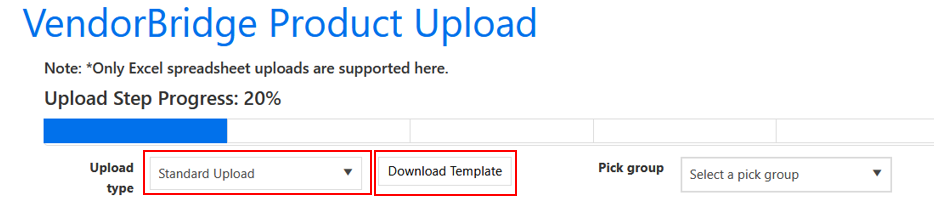
- On the “Upload Products” page, select the “Standard Upload” next to the green number one, then click “Click here to download the selected template”, as shown below.
- Once you have saved your spreadsheet, you will upload it using the same “Upload Products” page. However, there are several selections you will need to make before you are able to upload the file, as shown below.
For Step 1 on the “Upload Products” page, select the type of template you are uploading.
For Step 2, select that retailer for whom these products are being loaded.
For Step 3, select the warehouse to which this upload applies.
For Step 4, select the proper catalog for the products being uploaded (leave as “no Catalog Selected” if catalogs do not apply to you).
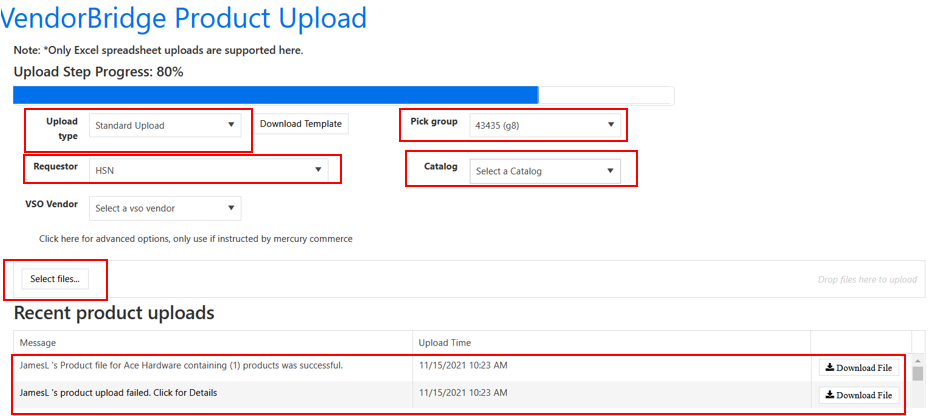
You are now ready to upload your completed spreadsheet. As shown above, for Step 5 click “Select File” and browse for your file. Clicking “Open” from the file explorer will automatically begin the upload. Once the upload has completed, a status message will appear on the bottom portion of the page in the “Recent product uploads” section stating whether or not the file was uploaded successfully. If the upload fails validation, the status message will describe the reason for the error to aid in correcting the issue. If you are unable to resolve the issue, please contact Mercury Commerce, Inc.
All Other Vendors (Including Standard HSN): MANUAL UPLOAD
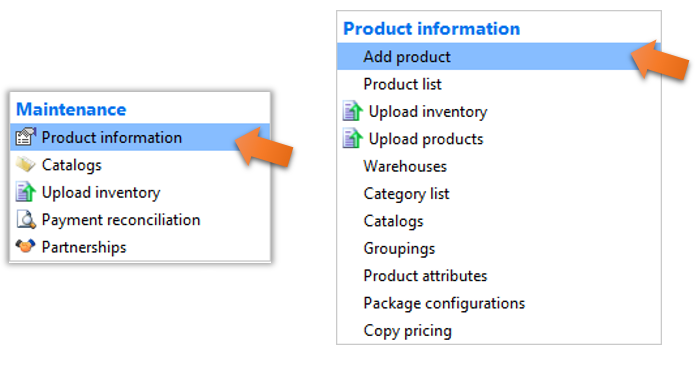
This method eliminates the need for a spreadsheet, but you must enter in each product and cross reference one by one. To begin, click on the “Product information” link from the VendorBridge Home page and then on “Add product”, as shown below.
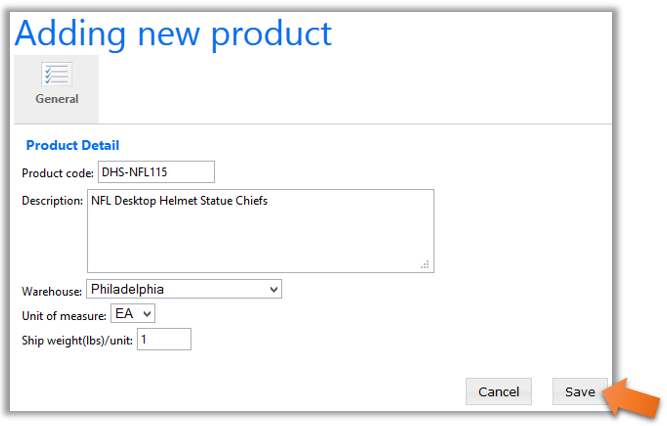
The “Adding new product” screen will then appear, as shown in the figure below. Fill in all of the fields on this page. No field should be left blank:
- Product code: This should be the product code that you use internally to identify products.
- Description: Enter a description for the item that clearly defines the product.
- Warehouse: Select the warehouse from which this product will be shipped.
- Unit of measure: This should always be left as “EA” for each, unless otherwise directed.
- Ship weight(lbs.)/unit: Enter the numeric value of the ship weight in pounds per unit WITHOUT any added abbreviations in the field.
Once you have entered all of the information click “Save”, as shown below.
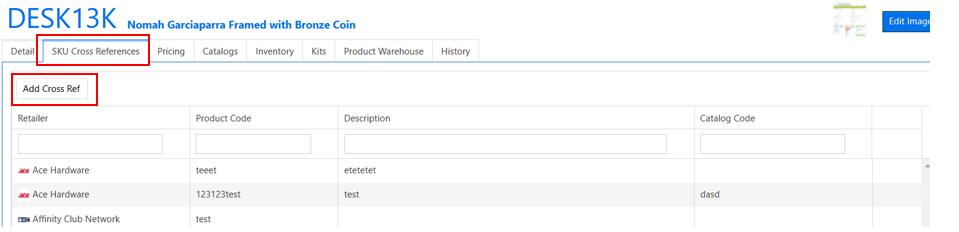
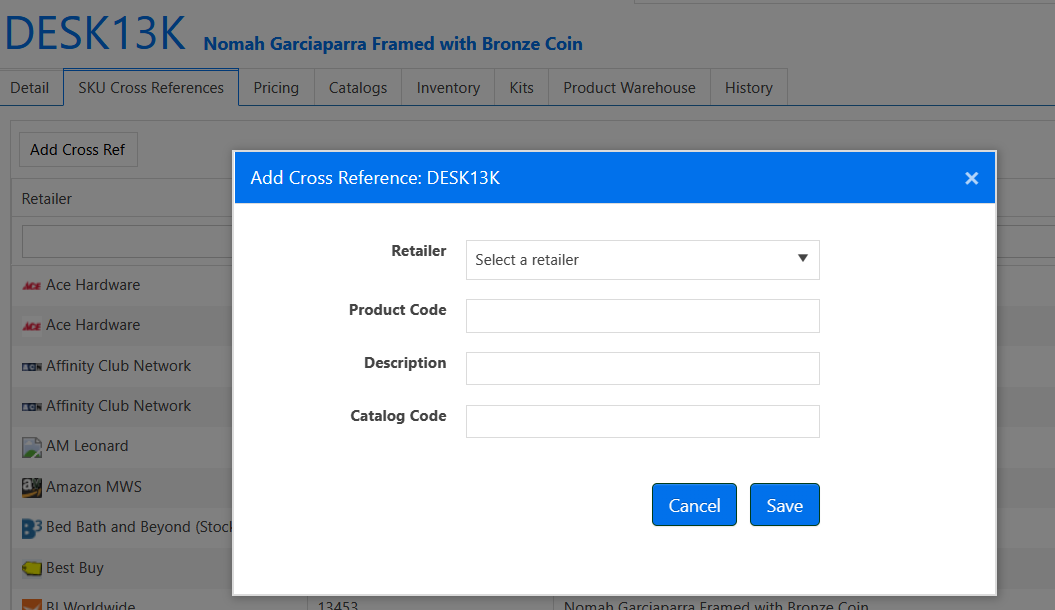
After you click save, you will notice that new tabs will appear across the top of the page. Click on the “SKU cross references” tab then, click "Add Cross-Ref", as shown below to begin filling out the cross-reference information. On this page you will need to select the Retailer and enter in the Retailer Product Code and Retailer Description EXACTLY as it has been specified by your retailer. These codes and descriptions usually differ from what you use internally to identify products. Click the “Save new X Ref” button, as shown below, when you have filled out the necessary information.
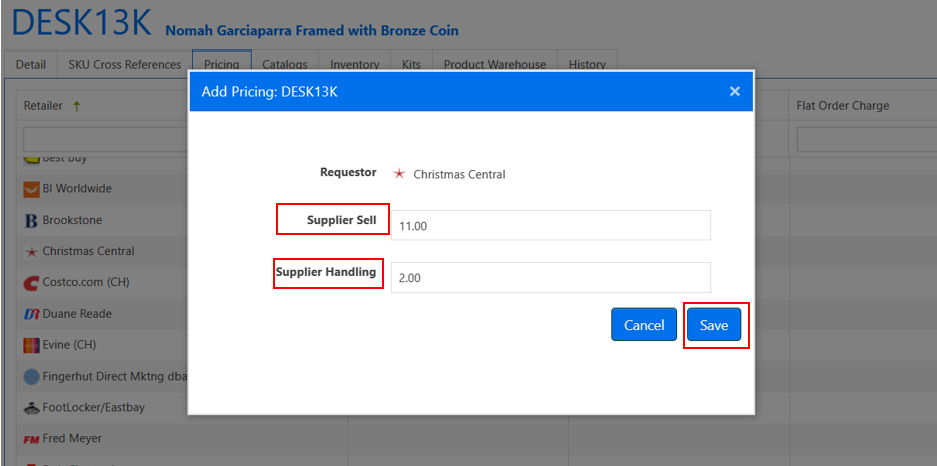
Next, click on the “Pricing” tab. On this page you will enter in the “Price” and the “Handling” of the product. Once you have entered in the information, click the blue save disk button in the bottom right corner, as shown below.
To enter the next product, click on the “Add product” link on the left and repeat Steps 2-5 as needed.
Still stuck?
Tell us what you tried and we will take it from there. We will know which article you were reading.