
On this page
Instructions for Vendors with separate Packing Slips and Shipping Labels, and who are using FedEx Ship Manager to complete shipping confirmations.
Before You Begin
It is recommended that you review the steps provided in the "Important Notes for Configuring Folder Options" article.
We also recommend that you review the "Information for First Time Users" page on VendorBridge to ensure that your browser is properly configured to preview/print the packing slips that you will generate.
Product Cross References
You may need to apply a cross-reference for your products before you are able to begin printing and processing your first orders. A cross-reference will need to be applied once for each new product that is transmitted to VendorBridge. Once applied, you will never need to save the cross-reference for the same product again.
You will know that a cross-reference needs to be applied if the message shown below appears on the VendorBridge home page. Please follow the instructions provided in the "Quick Cross References" guide. If you do not see the below message, your products are already listed on VendorBridge and you are ready to begin printing and processing orders.

Printing Packing Slips and FedEx Shipping Labels
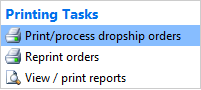
- Log on to VendorBridge and click “Print/process dropship orders” as shown below.
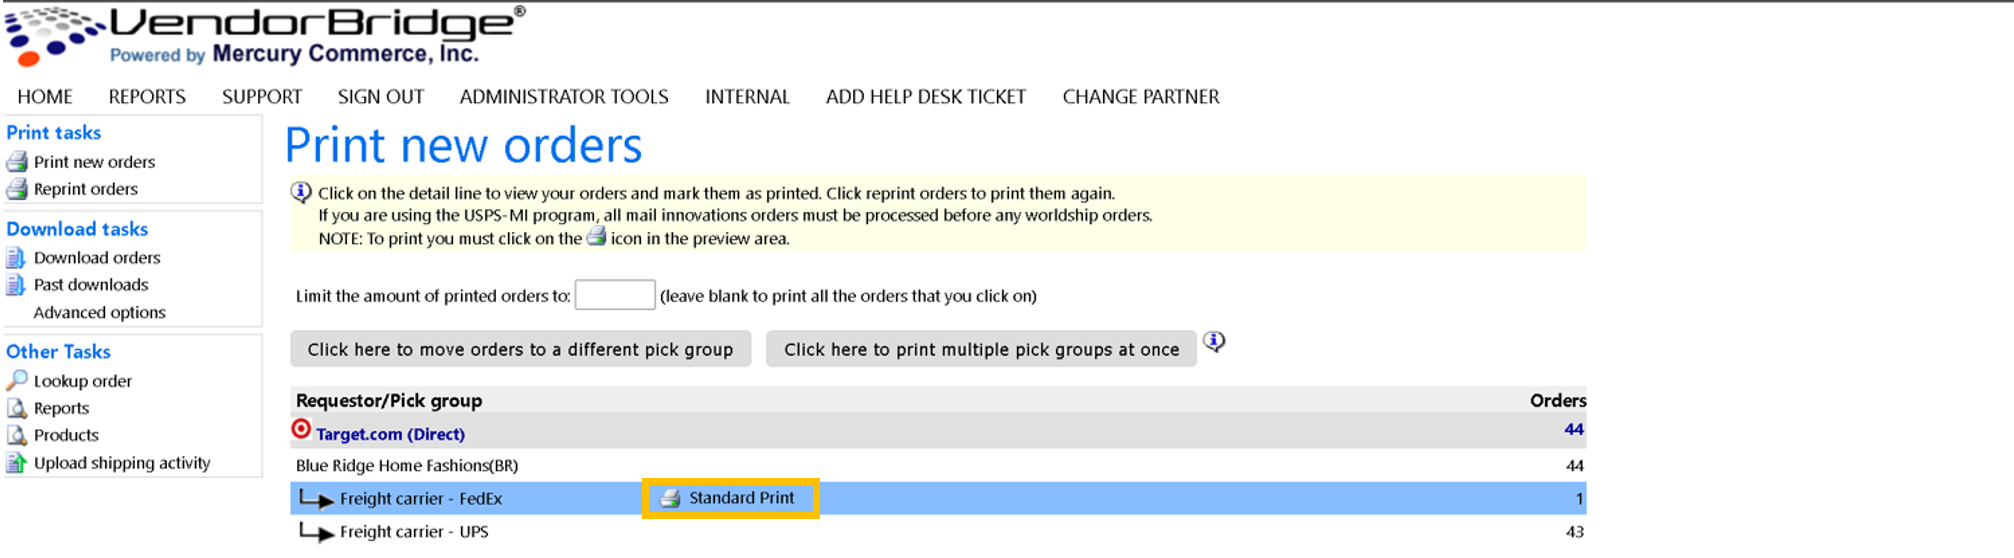
- Choose the Requestor and Pick Group from which you would like to print and hover over it with your mouse. Printing options will then appear to the right. Click “Standard Print” as shown below. If you would like to limit the number of orders that can be printed, enter a specific number in the box at the top of the page.
- The default shipping method for packages where the shipping method is undefined by the retailer is “Ground”. This can be changed to either Overnight AM, 1-Day Saver, 1-Day, 2-Day, 3-Day, or 4-Day. Only change the default service level of ground if your product must be shipped at a higher service level as per your agreement with the retailer.
Note: VendorBridge will automatically upgrade only the orders that require it based on the transit days from your Ship-From Zip Code to the Destination Zip Code. For example, if you select the 2-Day upgrade option for the Least Cost Transit Zone, only the orders that will take longer than two days to reach their destination will be upgraded to the 2-Day service type. All other orders will remain as Ground service, except where a more expedited service type was defined. If a retailer specifies 1-Day on a particular order and you choose the 2-Day upgrade, the 1-Day service will still take precedence over your selection and the shipping label will be generated accordingly.
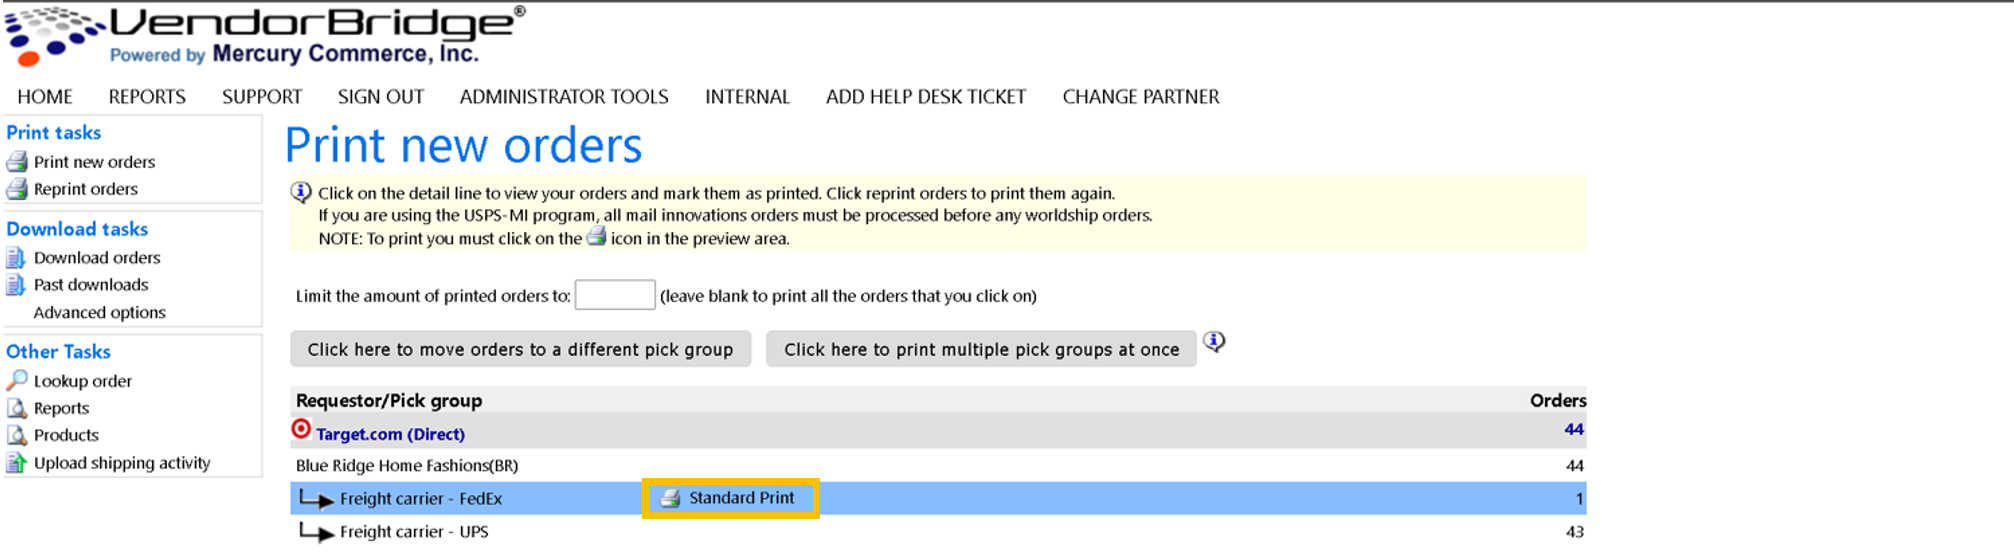
Once you have chosen a Least Cost Transit Zone as an override, click “Standard Print” as shown below.
- After clicking the link, the packing slips with the integrated shipping labels will be generated on a new page. The options for printing the packing slips/shipping labels will vary depending on the browser that you are currently using to access VendorBridge. Please skip to the section below that is appropriate for you:
Internet Explorer
Note: Please be sure that you have reviewed the "Information for First Time Users" page on VendorBridge to ensure that Internet Explorer is properly configured to preview/print the packing slips.
You will be able to print the packing slip using the "Print" button on the toolbar at the preview window.
After the packing slip has printed, you will click the "Click here to download the selected order in this format" button above the toolbar to obtain the download file to import into FedEx Ship Manager.
Both the print and the download options are shown below:
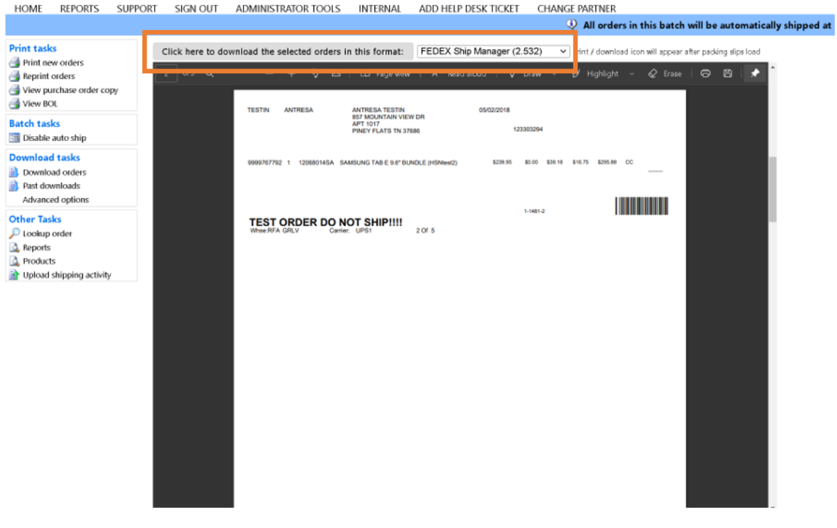
After clicking the download button, you will then save the file by clicking the down arrow to the right of the save button that appears at the bottom of the page, then choose "Save As" as shown below:

At this point, please proceed to Step 5 below, located after the browser-specific instructions.
Google Chrome
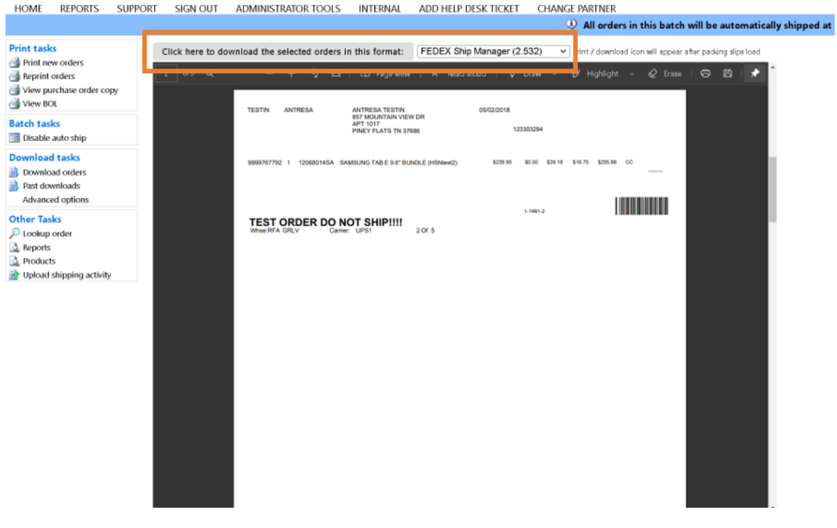
You will be able to print the packing slip using the "Print" button on the toolbar in the top right corner of the preview window.
Note: You may need to move your mouse over the top section of the packing slip preview before the toolbar will appear, as Chrome sometimes automatically hides the toolbar when not in use.
After the packing slip has printed, you will click the "Click here to download the selected order in this format" button above the toolbar to obtain the download file to import into FedEx Ship Manager.
Both the print and the download options are shown below:
At this point, please proceed to Step 5 below, located after the browser-specific instructions.
Mozilla Firefox
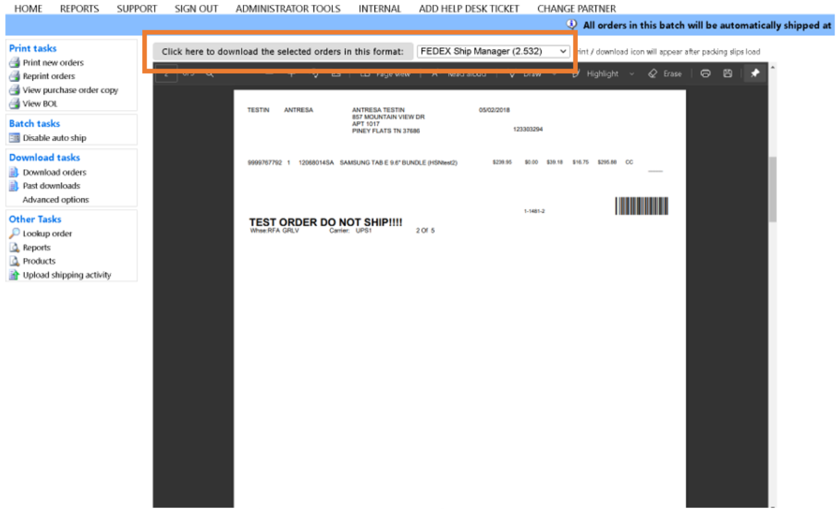
You will be able to print the packing slip using the "Print" button on the toolbar at the preview window.
After the packing slip has printed, you will click the "Click here to download the selected order in this format" button above the toolbar to obtain the download file to import into FedEx Ship Manager.
Both the print and the download options are shown below:
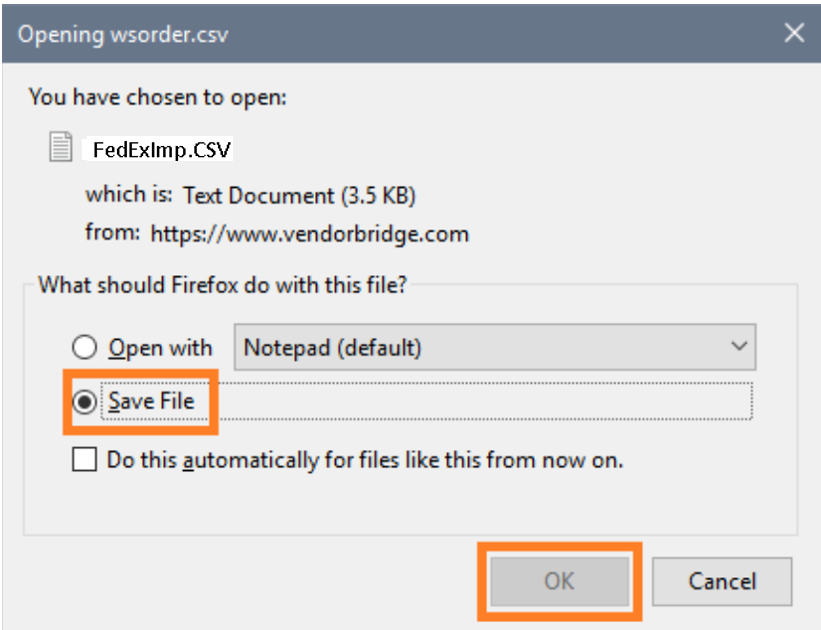
After clicking the download button, you will then choose the "Save File" option, then clicking "OK" as shown below:
At this point, please proceed to Step 5 below.
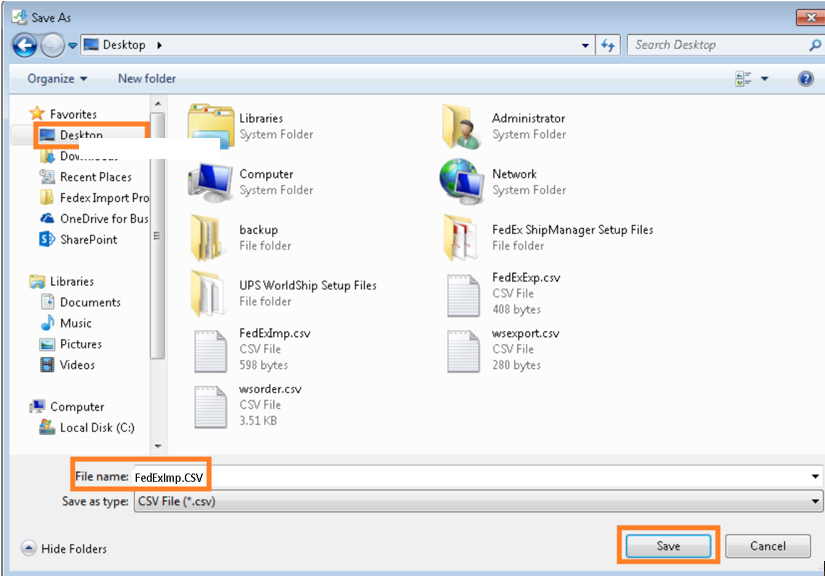
- You will now be asked where to save the file. Please be sure that you choose the “Desktop”, and that the file name is “FedExImp.csv”, as shown below. There should not be any extra numbers at the end of the file name. Once you have verified that these settings are correct, click the save button.
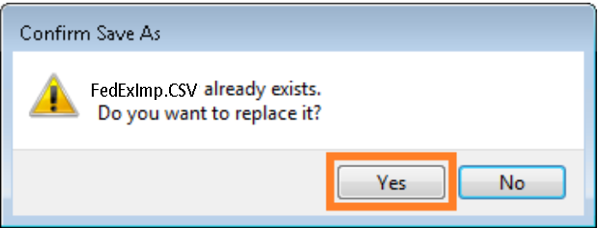
After you click save, a new window will appear asking if you want to replace the file. Please be sure to always click "Yes" as shown below so that the order file is always updated with the newest information.
Processing Orders Through FedEx Ship Manager
Batch Import
Open FedEx Ship Manager.
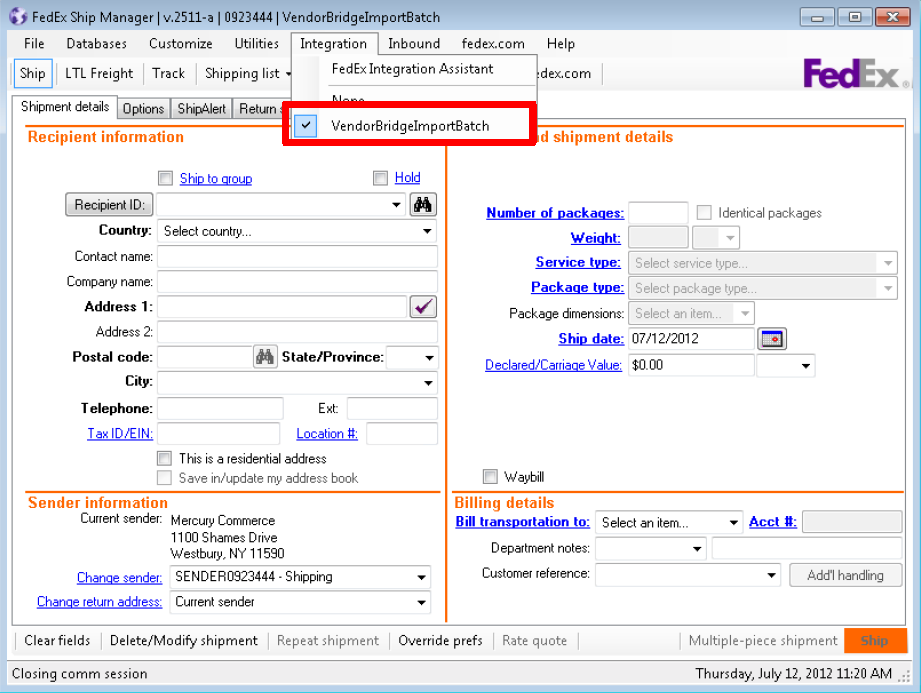
To begin importing orders, select “Integration” and then select “None” if it is not already selected. Once “None” is selected, select “Integration” again and then select “VendorBridgeImportBatch”, as shown below. This will begin the import process.
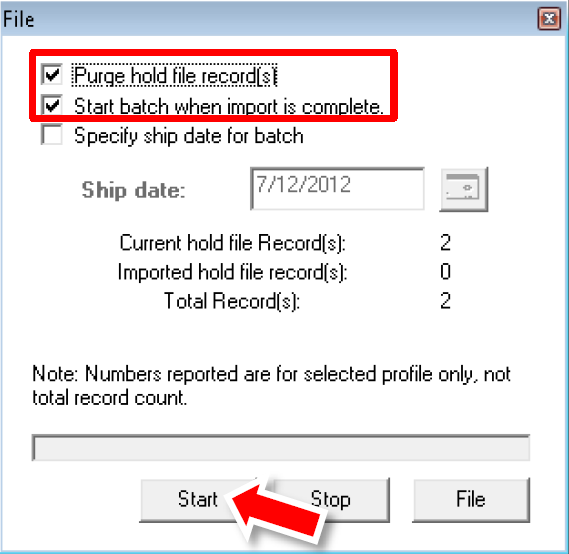
- The windows shown below will appear. Select the first two boxes and then click "Start".
 <
<
- When the progress bar shows a completed import, you will be able to click the “Close” button in this window next to “Start”.
Closing the Shipping Day
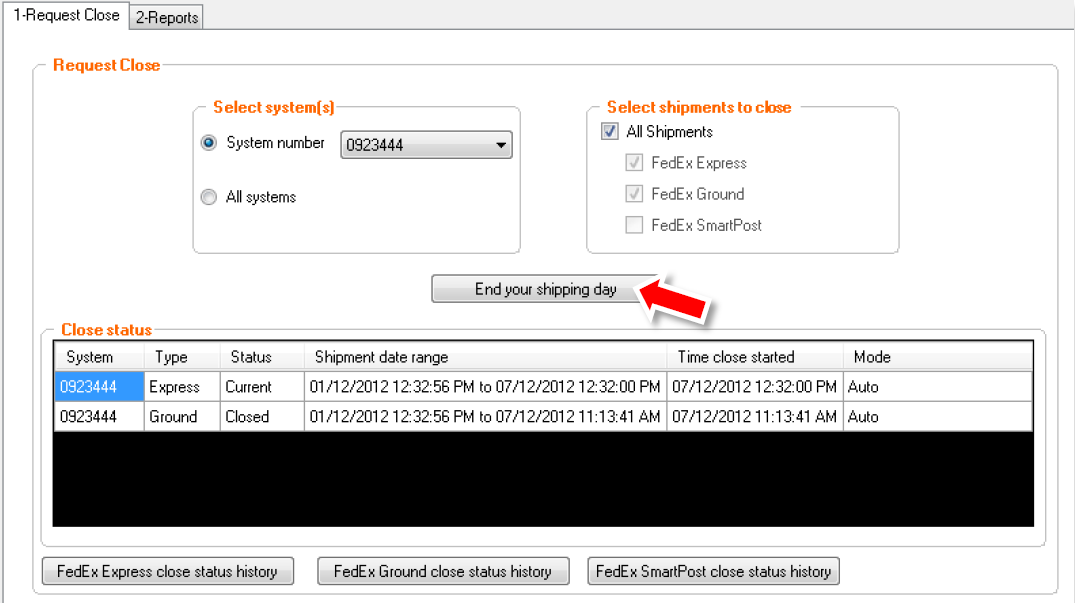
- When you have finished importing orders for the day, click the “Close” button to end your Shipping Day, as shown below. This will include all shipments, even orders not imported from VendorBridge.

- Click “End your shipping day” on the next window to complete the process, as shown below. You will receive a message saying that it complete. Click “OK”.
Batch Export
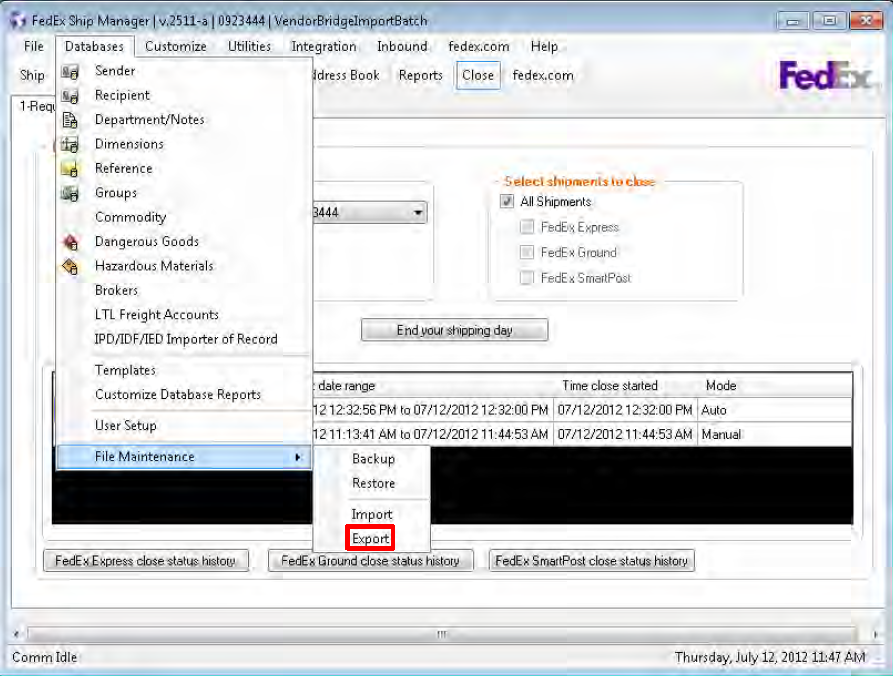
- You are now ready to generate the shipping file that you will upload back to VendorBridge to complete your shipping confirmation. To do this, go to “Databases”, select “File Maintenance” and then “Export”, as shown below.
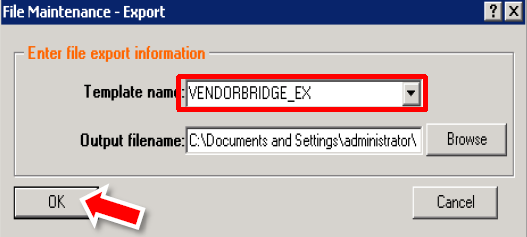
Select the template named “VendorBridge Export” and click “OK”, as shown below. You will be prompted to “Overwrite the existing file”, where you will want to click “Yes”.
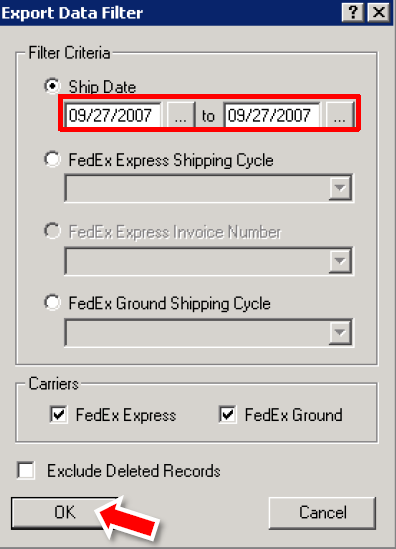
- Select a date range of orders which will be generated in the Export File and click “OK”, as shown below.
- You will now see the Export Preview. This will confirm what you are saving in the FedExEXP.csv file that you will now upload back to VendorBridge.
Uploading Shipping Confirmations
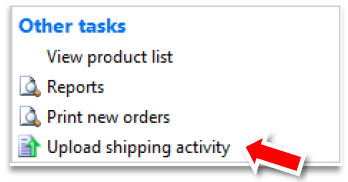
- Now you are ready to upload the shipping file back to VendorBridge. To upload the FedExEXP.csv file, click the “Upload shipping activity” link, as shown below.
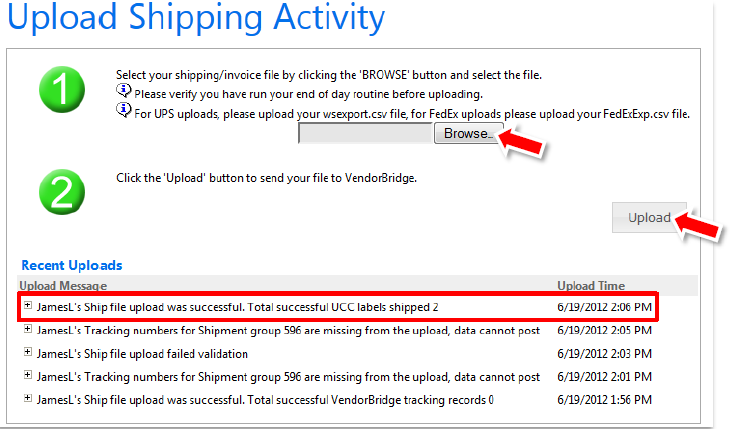
You will then be brought to the screen shown below. Click browse and find the FedExEXP.csv file that you saved on your desktop, then click “Upload”. If the upload was successful, you will see the status message appear in the “Recent Uploads” section. You will also receive a failure message if the upload was not successful.
Still stuck?
Tell us what you tried and we will take it from there. We will know which article you were reading.