
On this page
This manual will assist you in obtaining and uploading the proper product template used for products that are eligible for HSN's ECO program only. If you have not been enrolled in the ECO program by HSN, please refer to the following Help Center Article: How do I upload product information?
How It Works
VendorBridge for use with the HSN ECO program is designed to simplify product management. Any data that is uploaded by the vendor to VendorBridge/Mercury Commerce, Inc. while participating in the HSN ECO program is subsequently transferred to HSN automatically so that data need only be uploaded once to a single location rather than attempt to manage data in multiple locations (i.e. the retailer's internal vendor portal).
Please note that it may take up to several hours after VendorBridge sends the data to HSN for the retailer to process the data and post the changes to their system.
Uploading Product Information to VendorBridge
The first step in completing the VendorBridge / HSN ECO Setup process will be uploading all product information to VendorBridge.
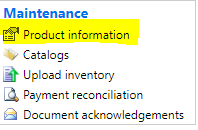
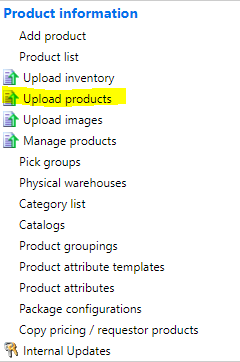
- Fill out the appropriate spreadsheet for the HSN ECO program from the “Upload Products” page. You can reach the “Upload Products” page by clicking on the “Product Information” link under the “Maintenance” header of the VendorBridge Home page then clicking the “Upload Products” link, as shown below:
- Once you have received and completed the product template given by your HSN Representative, you will upload it using the “VendorBridge Product Upload” page. However, there are three selections you will need to make before you are able to upload the file, as shown below:
- For Step 1, on the “Upload type”, select the type of template you are uploading, in this case, it will be "HSN ECO Upload".
- For Step 2, select the Pick Group to which this upload applies.

- For Step 3 Click “Select Files” Browse on your computer for your upload file, from the file explorer will automatically begin the upload.
Once the upload has been completed, the green color will determine whether or not the file was uploaded successfully.

If you are unable to upload the file, please contact Mercury Commerce, Inc.
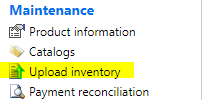
Go to Home Page- Click Upload Inventory
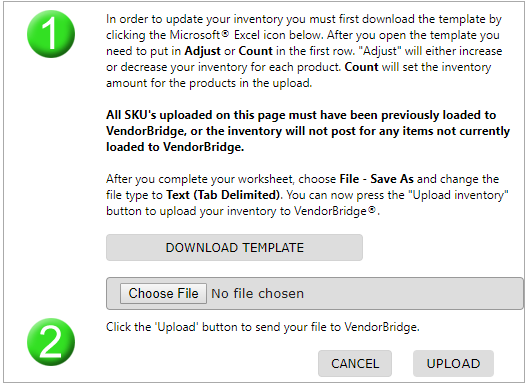
Download Template
Uploading Images to VendorBridge
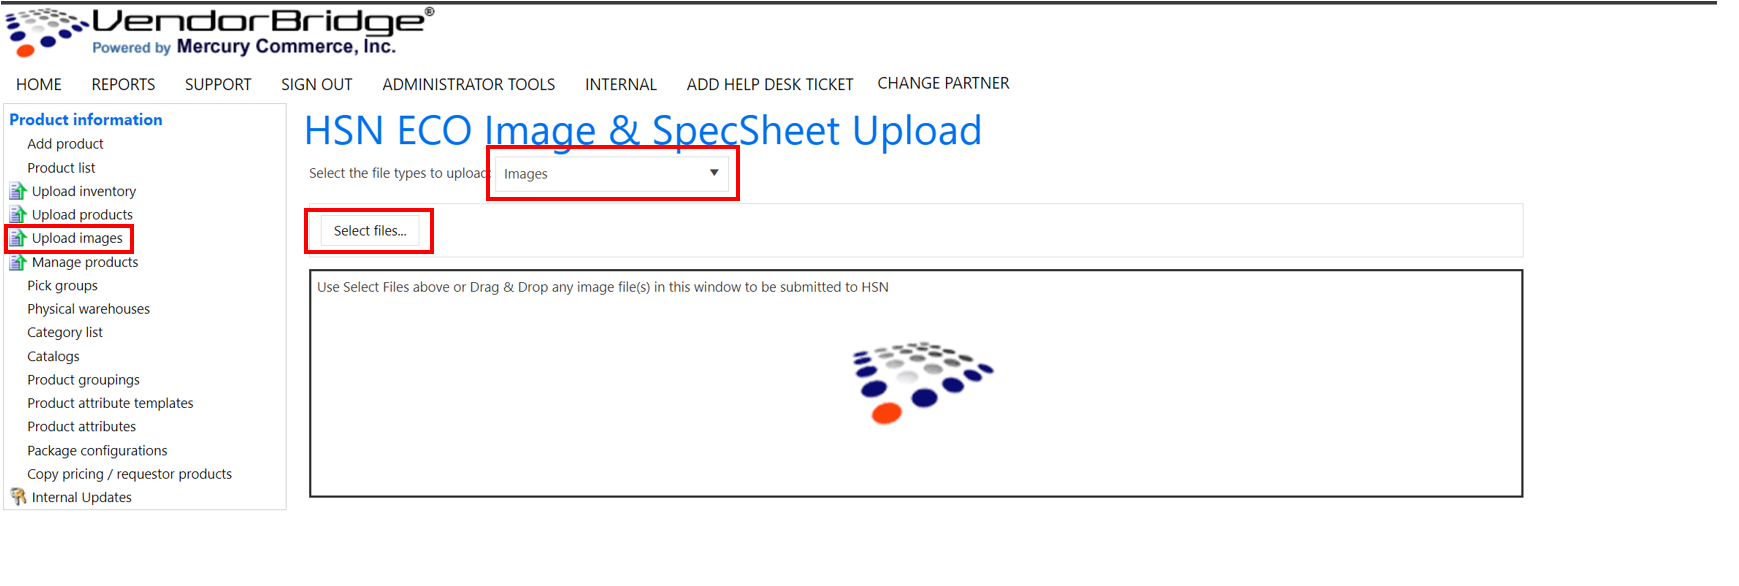
To Upload images, please see steps below:
Click "Product Information"
Click "Upload Images"
3)Drag and drop or select file from your computer to Upload.
Note: Please only upload .Jpeg or .jpg image types or upload will not be successful.
Uploading Spec Sheets to VendorBridge
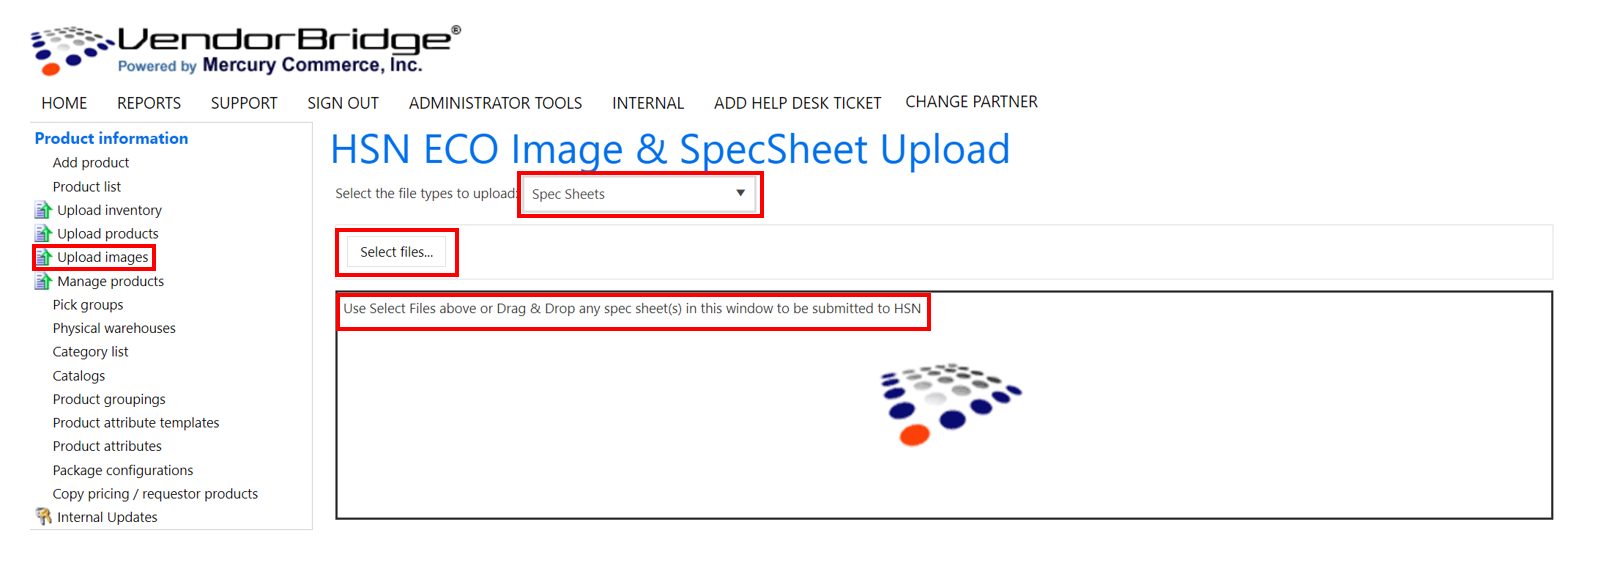
To Upload images please see steps below:
Click "Product Information"
Click "Upload Images"
Select Spec Sheets from the "Select the file types to upload" Dropdown
4)Drag and drop or select file from your computer to Upload.
Note: Please only upload excel file types or upload will not be successful.
Note: Below steps are directions on uploading Images and Spec Sheets using FTP if required.
Transferring Product Images via FTP
Once your product information has been uploaded successfully, follow the instructions below to upload product images to the VendorBridge FTP server. These images will subsequently be sent to HSN automatically.
Important Note on Transferring Images
- Do NOT transfer folders into the “Images” folder on the FTP server. Doing so will result in your images not being transferred to HSN.
- Size Of photos uploaded limit (3000 X 3000)
- Images must be properly named properly with your corresponding internal product code and of the “.jpg” file type. For example, “ProductCode.jpg”.
- Use file explorer for image transfer.
How to install FileZilla on your PC (windows)?
Before proceeding with the FileZilla installation we should download the corresponding package from the the link https://filezilla-project.org/download.php?type=client.
After the download of the correct package (the .exe extension package is recommended) click on it.
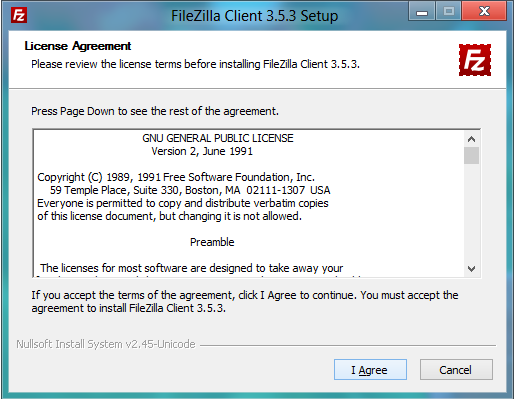
The License Agreement screen will appear. Select agree
- On the next screen you should decide whether every user of the OS can work with the FTP client or it is allowed only for the admin account.
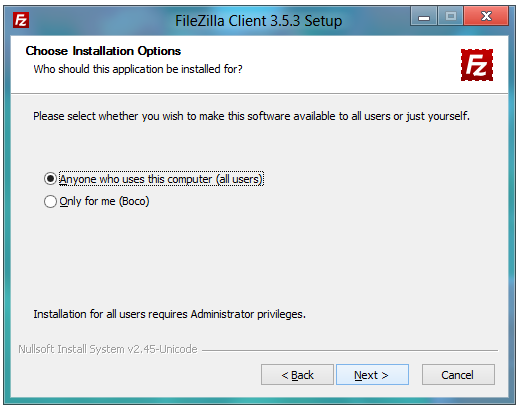
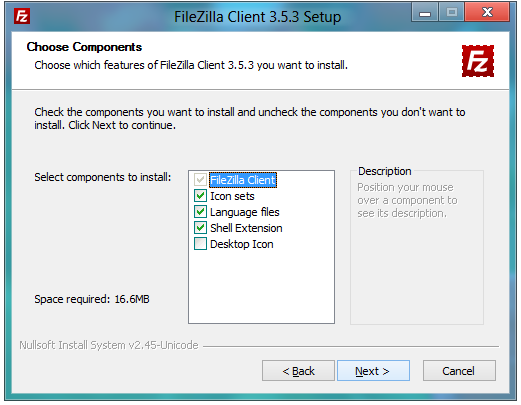
- Click on the Next button to proceed. Select the components which you want to install. When ready - click on the Next button.
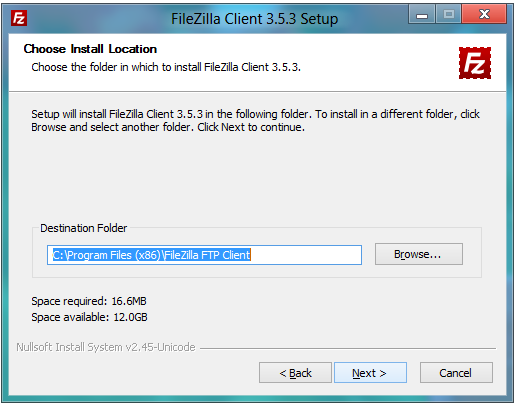
- The next window allows you to set the destination folder for the FileZilla installation. Choose the desired folder and press the Next button.
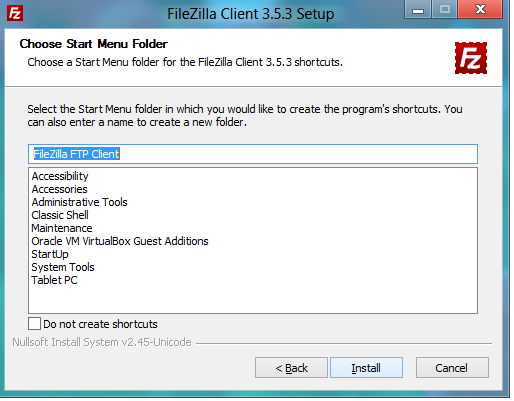
- After that you should choose the Start Menu folder and click on the Install button.
- The installation should be completed in a few minutes. You can leave the Start FileZilla now check box checked and click on the Finish button. This will start your FileZilla FTP client.

How to install and configure FileZilla on Mac OS?
- First of all, you have to download the setup of Filezilla from their official website. You have download the file made for the processor in your Mac. Use link for program https://filezilla-project.org/download.php?platform=osx
- Installation isn’t going to start automatically, find the FileZilla_(version number)_tar.bz2 file on your Mac and double-click on it.
- Going through the installation instructions, you are going to be asked to agree to FileZilla’s general public license, then select options and a location for your FileZilla files.
- When you have completed the last step, click the “Install” button to install FileZilla on your computer. When you are done with the installation click on the “Close” button.
You have to use the following login details for connecting to VendorBridge's FTP Account
- FTP server name: ftp.vendorbridge.com
- FTP username: The username for FTP you are provided.
- FTP password: The password for FTP you are provided.
- mode: passive
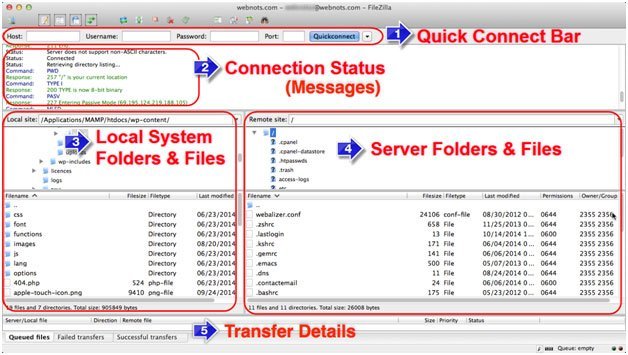
When you are done with entering your settings, you have to click the “Quickconnect” button in your FileZilla toolbar in order to connect to your account.
When you connect successfully, you are going to see note in the status area at the top of your screen indicating that you are connected.
The files and folders on your own computer will appear in the “Local Site” pane on the left side of your screen. Your Web Hosting account files and folders will appear in the “Remote Site” pane on the right.
You will be now able to transfer files and folders between your local computer and your hosting account.
Please note that the following instructions reference utilizing Windows File Explorer (i.e. your document window) to complete the FTP transfer. You will not be able to complete the transfer using an internet browser.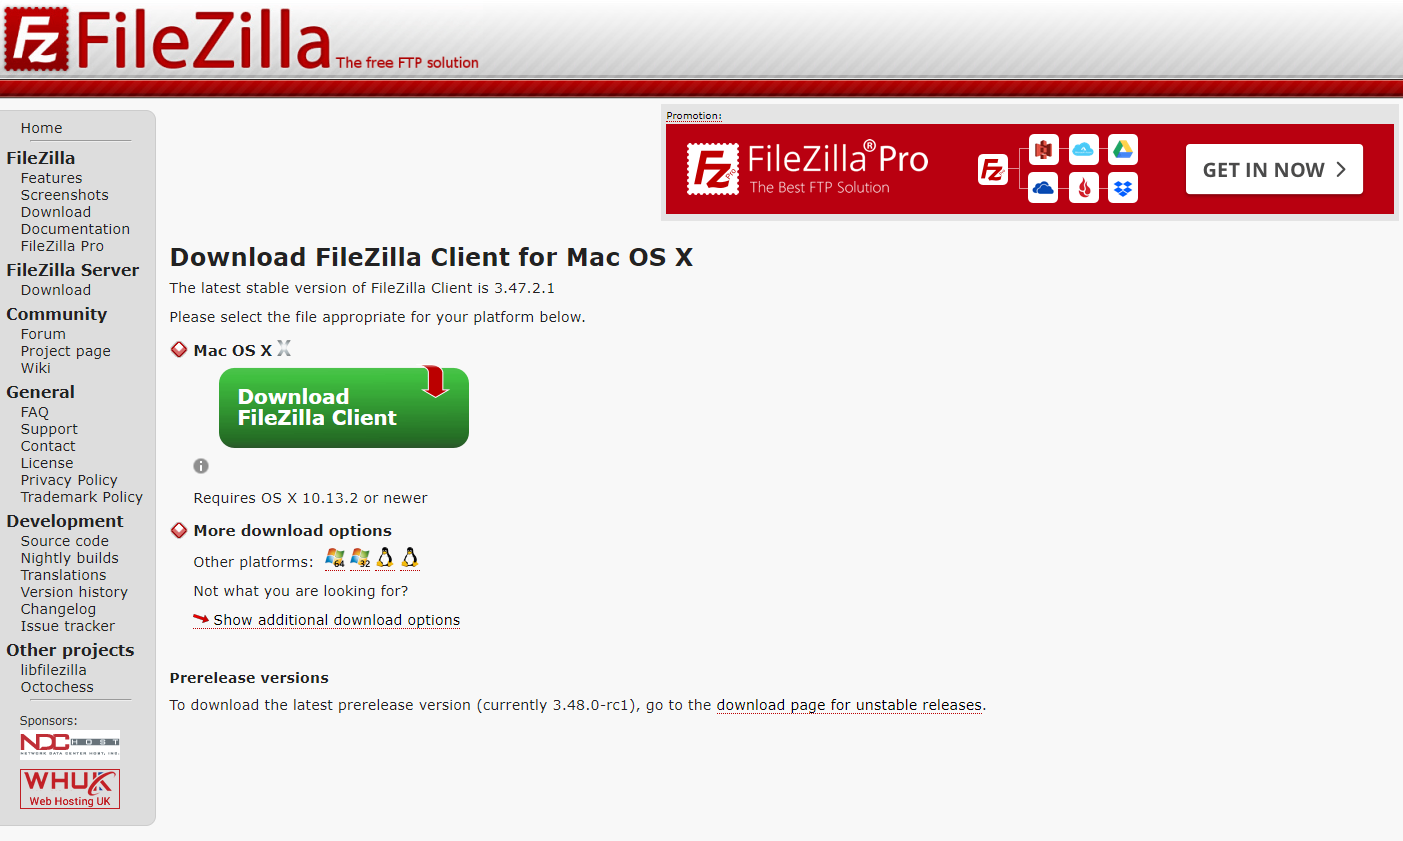
Image Below program
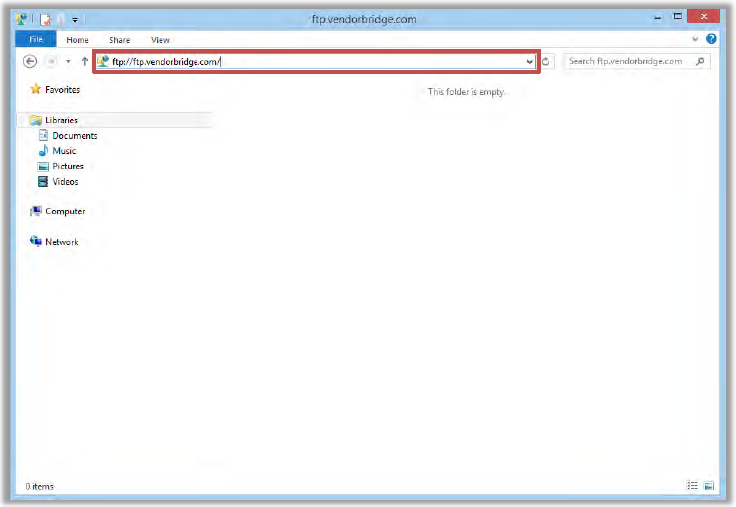
- Open Windows File Explorer and type “ftp.vendorbridge.com” into the location bar, as shown below. When the full address has been typed, press "Enter" on your keyboard to navigate to the path.
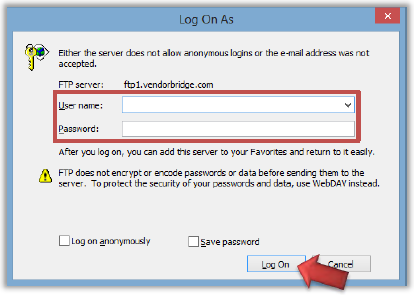
- You will then be prompted for your FTP username and password. This would have been supplied to you during the initial setup phases. Enter the credentials and click “Log On”, as shown below. If you do not have the necessary credentials, please send a message to our Support Team and they will provide them to you.
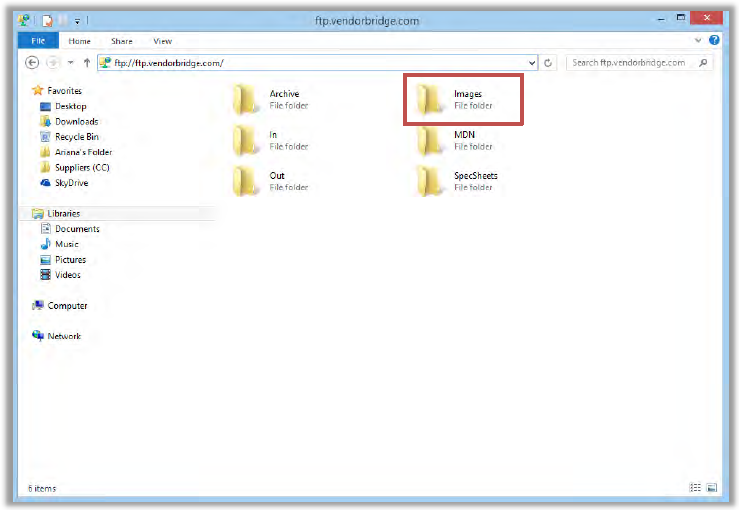
Once you have logged in successfully the folders for your account will populate in the File Explorer window, as shown below:
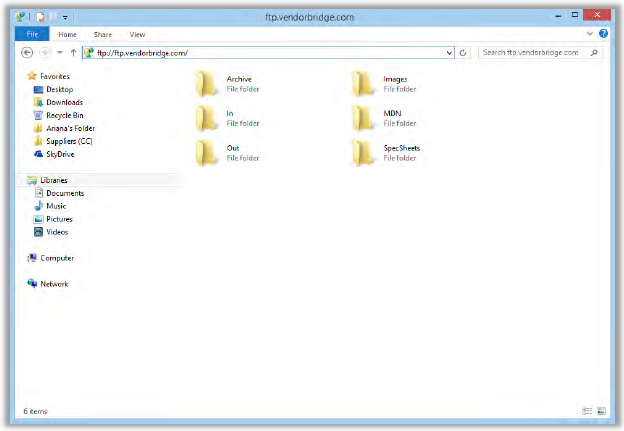
- Once you are able to see the folders in the window, you may transfer your images into the “Images” folder, as shown below. You may drag-and-drop your images or copy-and-paste.
Transferring Product Spec Sheets via FTP
The method for transferring your product spec sheets via FTP is the same as transferring product images with one exception: You will want to drag-and-drop your spec sheets or copy-and-paste them into the "SpecSheets" folder instead.
You will also need to be sure that the file names of your spec sheets match what you had specified in the initial ECO product upload template to ensure that HSN can match the appropriate spec sheet with the corresponding product.
Still stuck?
Tell us what you tried and we will take it from there. We will know which article you were reading.